Firmware, Firmware, who needs Firmware?

OK, you have this whiz-bang multi-hundred dollar scanner sitting there and you want to make it much more better! You read about Firmware Updates but haven’t a clue what this means. Should you update the firmware on your scanner? If so how do I do it? What does it all mean? What is the meaning of all this? Can you do this for me?

First, let’s explain WHAT firmware is. Firmware is the operating system of your radio, it works behind the scenes and tells the radio how to deal with things like keyboard inputs, frequencies, etc. Just like your computer or phone has an operating system (Like Windows 10, iOS etc..) scanners do too. Remember, scanners these days are miniature computers, they work much in the same way.

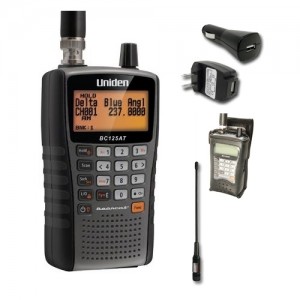
Firmware updates are released for a couple reasons. They either fix a problem or add/change features. Sometimes they do both. As an example, the BCD436HP’s most recent firmware update added the ability to add ProVoice digital, the version before that addressed an issue with clock settings.

When updating firmware one must follow ALL instructions CAREFULLY! You have the possibility of “bricking” your radio if you don’t do it right. This means that your $500 scanner may now be more useful as a brick than a radio… Follow the provided instructions to the letter and make sure that the program and firmware file you use is intended for your radio. The firmware for the PRO106 will not work on the PRO97!

Before trying to update the firmware on your radio make sure you have properly downloaded the firmware file itself as well as the installation program (if needed) BEFORE you start. If you do not have a replacement firmware file to install do not start the process since this erases the existing firmware to make the radio ready for the new version. No new version means no radio once you get going.

Some radios firmware updates are easier than others. The HomePatrol type radios use a program called Sentinel to check for new firmware versions and install them (easy, safe). Other Uniden scanners use a “Bearcat Version Updater” program to install a new update. GRE/RadioShack/Whistler scanners also use an application to install new firmware versions (nerve-wracking maybe).

What they all have in common is that they require a computer running Windows to update. You can use also a Mac as long as you are running Windows on it (with Bootcamp, Parallels, Fusion etc.). You also need the appropriate cable to connect from your computer to the radio. This is usually done via USB but some older radios use a Serial port.

Before updating your firmware make sure you have the following on hand:

  • The radio you want to update
  • The proper cable for your radio, along with the drivers already installed (if needed)
  • The Firmware Updating program appropriate for your radio
  • The actual firmware file itself
  • A strong sedative or plenty of alcohol to calm your nerves (optional)

Follow the instructions included with the firmware update TO THE LETTER. Make sure your radio and the computer can communicate properly. If you have programming software for your radio then read it first and save the programming file just in case you need to restore it to the radio. This also ensures that the radio and computer can communicate.

We also suggest that you check the RadioReference forum for your radio to see what other peoples experiences have been. Reading about someone else’s mistake is a lot easier than trying to fix your own.

Owners of PRO651 and PRO652 scanners that had tried to update their radios’ firmware versions had issues since no firmware updates were available until recently. Now one can download them and install them so previously bricked radios can be reincarnated.

ScannerMaster can update the firmware on many different models of scanners. Download the Hometown Programming Form for your radio and check the Firmware Update option if you would prefer our expert programmers to do this for you. We keep them heavily sedated all of the time already so their nerves are steady. Firmware Updates for “Zip Code Scanners” (HomePatrol, 436/536 and the WS1080/1088/1095/1098 series scanners) is included with the Setup and Optimize package already, it is an extra cost option for other scanners. If you aren’t sure call us and we will let you know.


Zip Code Based Scanning: How does it work?

You say you are interested in a “ZIP Code” scanner like a HomePatrol, BCD436HP or BCD536HP? You like the idea of having the scanner do all the programming by itself but don’t understand how it works? Here are the answers you are looking for! The HomePatrol and x36 scanners are wonderful technology and take a lot of the work out of scanning. By understanding how they work you can better understand how to use the radio and address any issues that might pop up.

First of all there are a couple misconceptions about these scanners. One common one is that they will only hear things in the chosen ZIP Code. This is incorrect. “ZIP Code” scanners use the location you enter into the radio (either by ZIP Code, city and state or by GPS coordinates) as a CENTER POINT. You then enter in a “Range” in miles, this creates a circle around that location. The larger the Range setting makes a larger circle and more stuff that will be programmed into your radio. The Range setting only affects what is programmed into the scanner, not the actual distance it will receive from.

When you set a location and range the radio will automatically program in all the services you selected within the circle and allow you to listen to it. If a Service Type is unavailable to be selected (greyed out) that means the database has no channels with that Service Type within the circle.

So what happens when you need to listen to something 20 miles away but really don’t want to listen to another area closer in? This is where the “Avoid” system comes in handy. Learn how to use the Avoid key on your scanner and use it to lockout Channels, Departments or Systems from your radio to help tailor your listening. “Avoid” works much like the Lockout function in older scanners. “Temporary Avoid? Means that the item will be locked out until the radio is shut off, the item will return the next time you turn on the radio. “Permanent Avoid” will cause it to stay locked out until you go in and “unavoid” it.

There is another way to easily tailor your HomePatrol or “x36” scanner to your preferences. This is by using Favorites Lists. Favorites Lists are basically your own frequency sets for your area. Instead of using the Nationwide Database and going strictly by location, a Favorites List will allow you to import Systems from the Nationwide Database or create your own from scratch. This is usually done with the Sentinel program that comes with your scanner. You can also work on Favorites Lists with ARC-Patrol (for HomePatrol’s) or ARC-536 (for the BCD436HP and BCD536HP).

To create a Favorites List you would import items from the Nationwide Database into it. You can then edit the information but adding or deleting your own information. You can also create a List from scratch and built it from the ground up.

If you selected ScannerMaster’s Optimize option for your HomePatrol or x36 scanner we would have created a Favorites List for you for your area. You can edit this if you want with Sentinel. You can also edit this from the scanner itself but this can be time consuming and kind of daunting. It is a bit easier on the 436 and 536 than the HomePatrol but we recommend that you do this in Sentinel, trust me it is a lot easier!

So where does the database itself come from? It comes from you and me! A website called RadioReference (www.radioreference.com) hosts a database where scanner users from all over the world share information. Each state and province has one or more Database Manager’s that filter submissions from users and update the main database. Once a week Uniden retrieves a copy of this database and makes it available to scanner users via Sentinel.

Hometown Programming, What it is and how it works

One of the services we have here at ScannerMaster is called Hometown Programming. You can send your scanner to us and we will program it for you. It is pretty much as simple as that! These services allow your radio to be ready to go as soon as you receive it.

There are actually 2 different programming services here, the right one for you depends on the radio you have or are going to buy. “Hometown Programming” refers to programming traditional scanners as opposed to “Zip Code” location based scanners. “Optimizing” refers to the updates and programming done on the various Location Based scanners, such as the HomePatrol, BCD436/536HP models and the newer Whistler WS1080/1088/1095 and 1098 scanners.

For Hometown Programming we will program in the county of your choice, including the local police, fire & EMS channels as well as the local State Police or Highway Patrol channels. One can add additional counties if they choose for an additional fee.

When we Optimize a location based scanner we will update the database on the memory card, make sure the radio firmware is current and create a local Favorites List for your area. We will also set the location to your ZIP Code.

We also offer firmware updates and installation of features like the Extreme or ProVoice Updates on certain capable scanners.

If you buy the scanner from us we can do the programming before we ship the radio to you. While this might delay the receipt of your radio by a short time, it saves the shipping costs and lets you enjoy your scanner as soon as you receive it, knowing that it has the most up to date programming available.

If you already have the scanner you can send it to us and we will program it then return it to you. Please make sure to use the forms found at

https://www.scannermaster.com/Articles.asp?ID=365

to make sure we have all the information needed to make the radio right for you. All the information you (and us) need is on the form, including the address to send the radio. Return time varies depending on the volume of radios in process but radios are returned as soon as we are done programming them.

While we do not do repairs on scanners there are times when all it needs is to be reprogrammed. If you aren’t sure call us at 1-800-SCANNER and one of our reps will help you decide.

Windows 10 and Scanners

Many people have recently been upgraded to Windows 10, whether they like it or not. For most people it seems to work fine, it just looks different. Most scanner software, such as ARC products, Sentinel and EZ-Scan works just fine in Windows 10 but might take a few steps to get it to work. Here are a few steps to make your transition a little easier:

1)         Update the cable.

If you have a Uniden XT series scanner and use the USB-1 cable make sure you have the newer version. There are 2 versions of the USB-1 cable. The older version will not work in Windows 10 (or Windows 8 for that matter). The ones we sell now work just fine in all versions of Windows. If your cable worked in Windows XP or 7 and no longer works in Windows 10 then it probably needs to be replaced by a newer version. You can also try a USB-Serial adapter and the Serial Port cable that came with your scanner.

Most RadioShack, GRE and Whistler orange, blue and black USB scanner cables seem to work fine in Windows 10. If your scanner (Uniden, GRE or Whistler) has a “Mini-USB port on the front or side of the radio that looks like a little trapezoid then a standard USB device cable will work.

2)         Update the driver.

Some cables and scanners require drivers. These are small files that tell the computer how to relate to and communicate with the radio. Check the ScannerMaster page for the cable or radio that you have for links to the current drivers. Most of the time it is better to install the driver first, then plug in the cable or device. Make sure that you install the driver for your operating system. If Windows 10 isn’t listed then use the Windows 8 driver, chances are it will work fine.

3)         Update the program.

Sometimes the application itself needs to be updated for Windows 10. Just like drivers however, if it worked in Windows 7 or 8 it should work in 10.

4)         If all else fails reinstall the program.

Sometimes after you upgrade to Windows 10 you will still not get the radio and program to communicate. We have found that many times, especially with ARC products, simple uninstalling the program and reinstalling it will fix your connection issues. Make sure you are updating to the latest version of the program. You can download the latest versions at the program’s website. Your activation keys will still work with newer versions of the same program.

As with any program, your results may vary. The above steps will fix a majority of the issues with scanner programs, they have fixed every issue I have had. Depending on the computer hardware, software, operating system and a host of other factors you may have an issue that just doesn’t want to work even after doing all this. If you still get stuck then you may need to contact the software’s support department.

The Digital Blues (or why does my local digital system sound like #$^?)

So you bought that fancy new digital scanner and while it usually works great, sometimes on certain digital systems it doesn’t seem to sound right. Sometimes it just drops words or phrases but sometimes it drops the whole conversation.

You try moving the scanner around or connect to a better antenna and it doesn’t help or even gets worse. Before you throw the scanner against the wall in frustration read on:

We feel your pain! The problem isn’t you or in or the programming. It is called “Simulcast Digital Distortion” or more commonly “Bit Error”. Our friends at RadioReference have a great technical explanation of this in their Wiki at http://wiki.radioreference.com/index.php/Simulcast_digital_distortion

The 10 cent explanation of this is that you have signals from more than one tower arriving at your radio at ever-so-slightly different times. These signals compete with each other and tend to null each other out. This is why sometimes the radio will stop but you won’t hear any or part of it.

There are a couple things you can do to help get past this issue. If your radio has an attenuator function try that first. This reduces the signal and hopefully will force your radio to only be able to receive a single tower site. You can also try moving the antenna around the room to see if you can find a “sweet spot”. If you are using a telescoping antenna try adjusting it to different lengths or angles. Also try opening the squelch all the way. If all you are listening to is the digital system then this will not affect other channels.

If all of this fails then you may need to try a directional antenna. Commonly called “Yagi’s” these antennas will direct your reception in a single direction and hopefully force your radio to hear only a single tower.

This type of digital distortion usually is less prevalent with newer models of scanners and firmware updates usually reduce it as well. Make sure you have a current model scanner and that its firmware is up to date.


Scanner Tip: Indoor Antennas

Chances are, if you have a scanner in the house, you have wondered if you need an outside antenna. While an outside antenna will almost always work better than an indoor antenna, sometimes that just isn’t feasible. If you live in a rental property, apartment or condo, or in an HOA restricted area you may not be able or allowed to install an outside antenna. Sometimes you just don’t want to go thru the work to do it. Maybe the spouse or significant other just won’t allow it.

There are alternatives, but as they are also compromises, they may work as well. They may however be good enough to allow you to listen to your targets. Depending on your unique situation, some or all of these ideas may or not work for you. Remember: There is never a guarantee that any of these ideas will ensure that you will be able to monitor your targets.

Let’s start with the simple ideas first. Your new scanner comes with a back of the set (or side of the set for a Home Patrol) antenna. This is usually a metal telescoping rod or a rubber-duck style antenna. Sometimes better reception may be had by a simple relocation or tilting the existing antenna. Maybe move the radio with its antenna closer to a window or away from the large metal objects will help.

The next step would be a better BOS (Back Of Set) antenna. ScannerMaster sells a variety of antennas, from direct replacements (if you lost or broke the one that came with the radio) as well as more advanced antennas. If you mostly monitor 700/800 MHz. systems a specialized antenna for these bands will work better than a general use antenna.

If these don’t help, then you may need a remote inside antenna like the Nomad. The Nomad is a wire antenna and is amplified (active). This allows you to mount the antenna in a better location and leave the radio where you want it.

The next step might be using a base station antenna indoors. ScannerMaster has several of these types. Basically this means a base station antenna with some sort of base to support it along with appropriate coax and connectors. These can be set up on a balcony or behind the drapes for aesthetic purposes.

You can also try a mobile antenna adapted to home use. Try a magnet mount antenna on top of a large metal cabinet, window air conditioner or balcony railing. Window mount antennas can be mounted on an apartment window just like you would on a car. Suction cup mounts work in a home just as well as in a car.

If you have access to an attic then you might try putting a base station antenna there. Try to stay away from large metal objects. If you have metallic shingle liners or solar panels they would likely interfere with your reception.

If you install an antenna outside, either on the roof or a tower, make sure to properly ground the installation to protect from lightening and watch out for electrical wires! Consider having them professionally installed. Use a high quality coax. Usually thicker cables work better at higher frequencies and longer distances. 50 or 75-ohm cable is fine for scanners since you will not be transmitting thru them. We will have a blog post soon all about Coax!

When bad things happen to good scanners: Heap Errors

On certain Radio Shack, GRE and Whistler scanners, specifically the ones using Object Oriented programming, one can be beset with an error message that reads “Heap Error” along with some seemingly random text.

These are caused when the radio doesn’t know how to deal with an Object programmed into the memory, usually a Talkgroup (TGRP) not assigned to a  Trunked System (TSYS).

If you can get into the radio programming you should make sure ALL talkgroups entered as Objects are assigned to a Trunked System. This is pretty easy to do in ARC500 or other programs but a lot more difficult without software. These radios are hard enough to program manually let alone find orphaned TGRP objects.

When programming by hand be sure to associate every TGRP with a TSYS BEFORE saving it. When programming with software sort the TGRP list by TSYS and make sure all are assigned to a TSYS. If it says “New” for the TSYS then you need to change or delete the TGRP. Also check for duplicates in your list of TGRP’s. These can also cause errors.

If you don’t have software to program the radio and can’t get into the radio to edit the objects you may well have to reinitialize it and start all over. (Press 0, then 1, then enter during the startup screen.) While this will erase the radio it will get rid of the dreaded Heap Error. If you have software you can usually read the radio even if a Heap Error is present.

Object Oriented programming is used for the following scanners:

GRE: PSR310, PSR410, PSR500, PSR600

RadioShack: PRO-106, PRO-197, PRO-651, PRO-652

Whistler: WS-1040, WS-1065

Scanner Tip: Antenna Matters or Antennas Matter!

If you have a scanner then you have an antenna, they don’t work well without them! Scanners will usually work better with better antennas. Makes sense, right?

So the next question is: What is the best antenna for me? The answer that age-old question is: “it depends”…

For many people using handheld scanners the antenna that came with it will often work just fine. If you are listening to local stuff then it probably is just fine. There are aftermarket antennas that will often work better for you, increasing the distance you can hear signals from or the strength of the signals you do hear. (Handheld Scanner Antennas)

All antennas are compromises. You have to balance size, construction and cost with the need for frequency range and portability. As a rule larger antennas usually work better than smaller ones, but that is not a golden rule.

Handheld scanners usually come with a “rubber ducky” style antenna. If you were to x-ray one or take it apart you will see that it is a coil of wire that looks like a spring, wrapped in rubber. This makes it flexible (so it doesn’t break) and allows more apparent length in a smaller package. These usually work pretty well for the most popular scanner bands (VHF-Hi and UHF) but not so good for VHF-Lo and 700-900 MHz.

You can buy a band-specific antenna, such as one made just for 800 MHz. While these will still work on other bands they will work best on the band they were designed for. If you use your scanner only for a specific band then consider an antenna for that frequency range for best performance.

If you use a scanner in the car or truck then some sort of outside or window antenna is almost always required. Remember that you are driving what is essentially a Faraday Cage, a metal cased vehicle that may also have metallic linings in the windshield. Unless you are listening to VERY local communications then you will likely need some sort of mobile antenna. These range from simple and inexpensive to complicated and expensive. (Mobile Scanner Antennas)

ScannerMaster makes several inexpensive and easy to install antennas for the car that will really work well for most casual scanner listeners. We have an antenna that looks like the cellular window mount antennas and another that mounts inside the windshield or back window. Another choice might be an outside magnetic mount antenna.

If you have a more professional need for a mobile antenna then we have several trunk-lip or hole mount antennas to choose from. These require installation by either a professional installer or someone who knows how to drill holes in a vehicle and route wires.

For reception in a home, office or other building the biggest advantage is elevation. The higher you go the better your reception in most cases. The best place for an antenna is the roof, preferably at the highest point. The next best is in an attic. Remember that any exterior antenna requires proper grounding and lightening protection! (Home/Office Scanner Antennas)

If you cannot install an antenna on the roof or in the attic then consider one of our inside antennas. These can be placed in a corner near an outside wall or window or even on a balcony. If you have a window air conditioner then maybe a magnet mount mobile antenna will work for you. Live in a high-rise? Try one of the inside mobile window mount antennas.

When buying a base station antenna to mount outside remember that some do not include coax and other necessities.(Antenna Coax) Remember that you need a place to mount it, like a TV antenna mast or vent pipe. Make sure you also account for the connectors, if your scanner has a BNC make sure you have the proper connector or adaptor. (Antenna Connectors)

In future Scanner Tips we will discuss antenna connectors, keep watching for that!

Scanner Tip:  Aircraft Listening with the Air Scanner Package

One of the favorite uses of scanners is for aircraft. It is exciting to listen to control towers, air to air, air shows and other aviation communications.

Some airports have viewing areas that allow you to watch aircraft operations. A scanner will allow you to listen to the operations and know what is coming along next. For the aviation photographer a scanner is essential!Uniden BC125AT Air Scanning Package

One of the best aviation scanners is the Uniden BC125AT due to its compact size, easy operations, low price and great features. We put together an Air Scanner Package based on the BC125AT specifically for the aviation fan, this include the W901 Airband antenna, leather carry case, AC and DC power adaptors and a Starter Aviation Frequency list. This package gets you up and running quickly!

The BC125AT handles the civilian VHF aircraft band (108-137) and the Military UHF Aircraft band (225-380) as well as other analog communications like railroads, some police, fire, EMS and business traffic. This is an easy to program and use scanner at a great price. For serious photographers we suggest keeping a scanner in the camera bag as well, at this price it is very affordable and the size is small enough to leave plenty of room for lenses and camera bodies.

Check out the BC125AT Air Scanning Package!